
Hey Friend!
Are you a crafter that loves to create something
different? Create elegant layers with your die cuts to create a quick and EZ
card! Make it simple or take it to another level and add floral embellishments
the choice is yours!

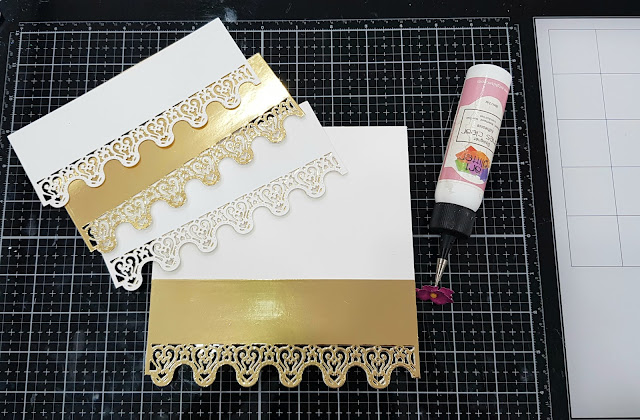
Step 1: Border
Cutting.
♥ Place the large
die on the Deluxe Flower Shaping Paper.
♥ Die cut 2 whole
frames and make 4 borders.

Step 2: Die cut 4 borders on Luxe
Gold Cardstock.
♥ Clean all 8 borders using spellbinders tool.

Step 3: Layering.
♥ Adhere 2 golden borders under the
white borders.
♥ Adhere 2 white border under the golden border using clear glue.

Step 4: Create the card base.
♥ Trim a Deluxe Flower
Shaping paper measuring 11 3/4 by 6 3/4 inches.
♥ Score on the long
side in the middle, fold it in half and ready the card base.
Step 5: Adhere first golden border on
the card front bottom edge using clear glue.

Step 6: Adhere dimensional tape on the back side of remaining three borders.


Step 7: Adhere all layers by
overlapping.

Step 8: Create decorative top for card base.
♥ Die cut the inside
die from the Classic Companion Border Die set on gold card.
♥ Trim the edges with
paper trimmer.
♥ Adhere on the top
empty part using clear glue.

Step 9: Add Sentiment.
♥ Stamp the sentiment on Deluxe Flower Shaping Paper from Thank
You Sentiment Stamp Set using VersaMark Embossing Ink.
♥ Cover with Gold Tinsel Embossing Powder and heat it using
Heating Tool.
♥ Die cut the sentiment using the Cut Mat Create 1A Die set.

Step 10: Add the sentiment using
dimensional tape.

Check all product details HERE!
Follow me on Facebook!
Follow me on Instagram!
Follow me on YouTube!
Pinterest!