Hello,
Designed this cascading card for someone using ScrapBoys Paper Collection.


Trim four small strips of corrugated sheet paper apply white acrylic paint roughly with brush apply clear glue after dry the paint and cover with Magic Glitter Powder, adhere these corrugated strips on the card base as shown using hot glue.
Die cut the shadow die from Fancy Classic Oval Frame Die on vellum and third largest die from the same set on Luxe Silver Card adhere this shape on the vellum shape using clear glue, cut the oval shape on corrugated sheet paper using oval die from Fancy Classic Oval Frame Die Set and apply white paint, next apply magic glitter and adhere this oval shape onto the silver frame using hot glue.
Die cut the oval shape using second and third largest die from Eyelet Oval Basic Large Die Set on Deluxe Card 2 adher together for the sturdiness apply versamark ink on it and cover with Blue Embossing Powder and heat it using heat tool, Add this oval frame on the oval corrugated shape using hot glue.
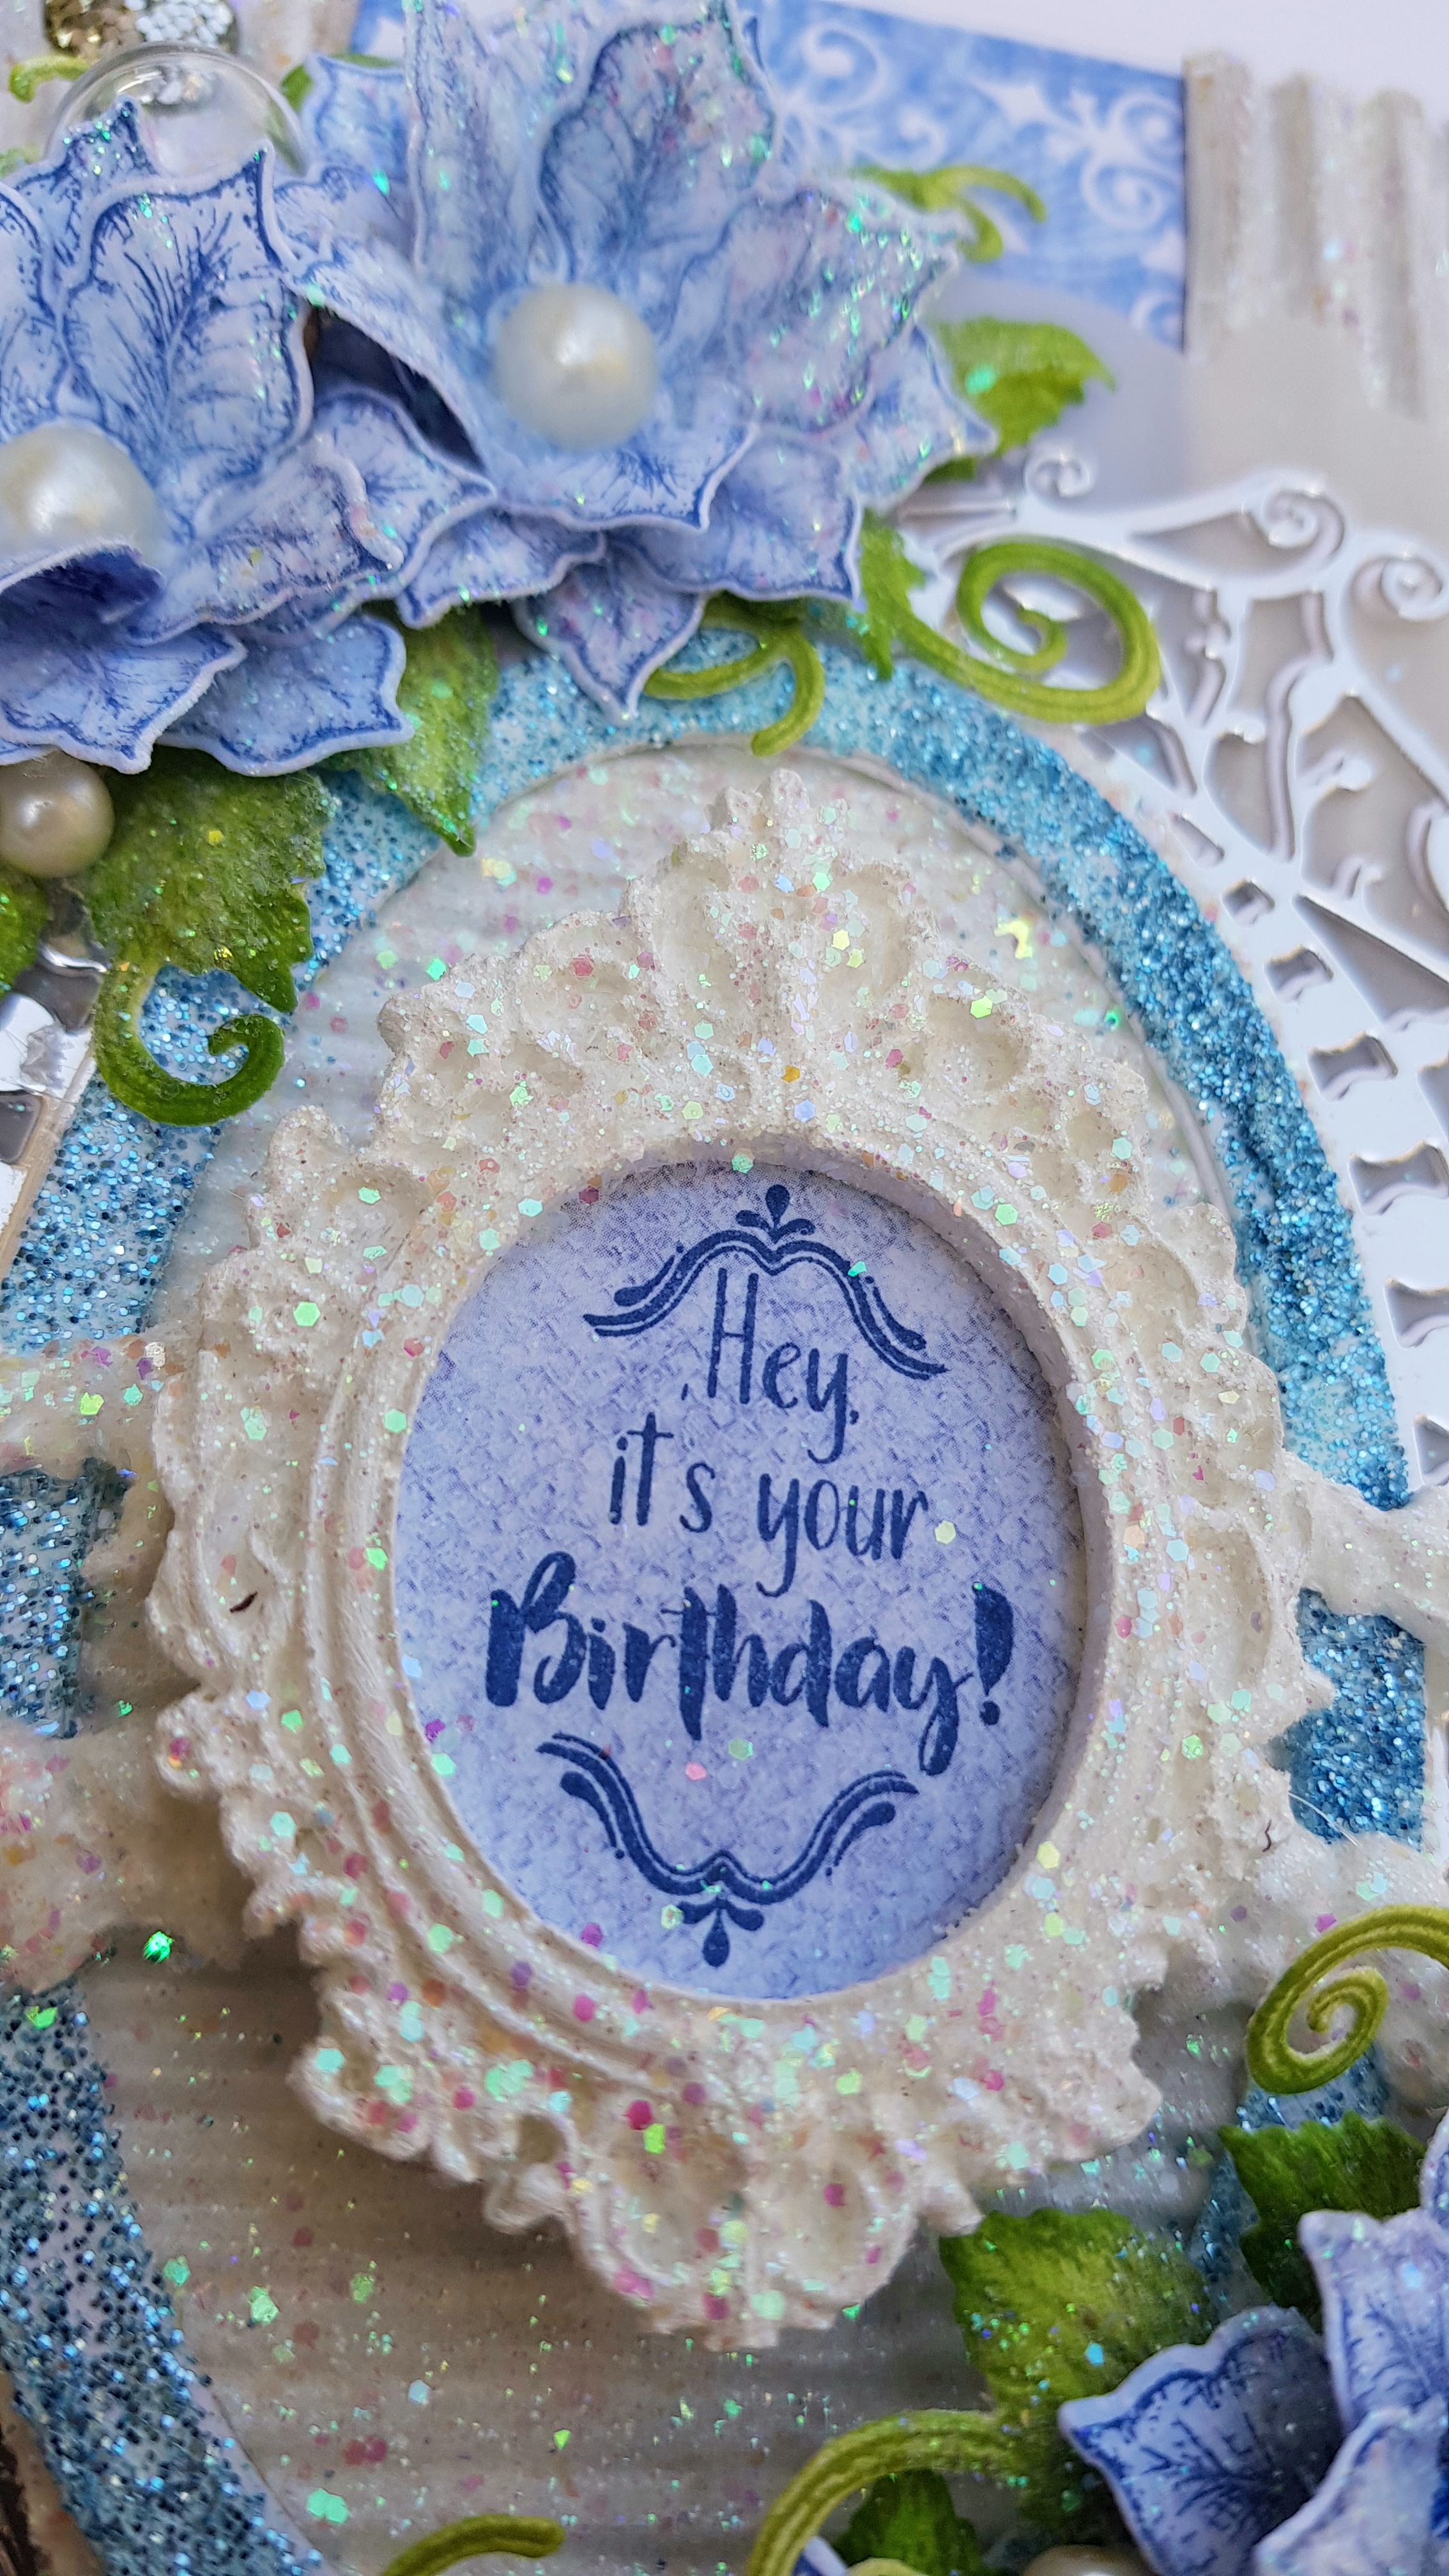
Cover the moulds with white paint and magic glitter, Stamp the sentiment from Birthday Sentiment Stamp Set using Night Sky Archival Ink on the designer paper and add insde the mould as shown, adhere moulds on the frame using hot glue.
Stamp the smallest poinsettia flowers from Large Festive Poinsettia Cling Stamp Set on designer paper sheet number 11 B using Night Sky Archival Ink die cut using coordinating die shape the flower using Golf Groove Tool and finish shaping using Deluxe Flower Making Kit, add pearl beads in the centers and make few flowers apply clear glue with sponge and cover the flowers with Nida Tanweer Magic glitter Powder.
Stamp The Leafy Accents on Deluxe Card using Leaf Green Archival Ink, color it using Vivid Chartreuse ink die cut using coordinating dies shape it in the shaping mould and cover with magic glitter powder.
Arrange all ready elements as shown using hot glue, add bridal stamens under the flowers in empty space and finish the card by adding resign silver beads.
Other Products:
Vellum Paper, corrugated sheet paper, Hot Glue, Nida Tanweer Magic Glitter Powder, Dimensional Tape, Moulds, White acrylic paint, Brush, Peal Beads, Adhesive Silver Beads, Versamark Embossing Ink, Blue Fern Embossing Powder, glass tussles.


For the card base take Deluxe Flower Shaping Paper measure 9 1/2 by 10 inches score from the long side at 5" and fold it into half, the card base is ready. Trim another panel from Deluxe card measure 9 1/4 by 4 3/4 and adhere on to the card base using dimensional tape and set aside.
Stamp snow flakes stamp from the Large Holiday Star Cling Stamp Set on Deluxe Paper using versamark embossing, cover with silver embossing powder and heat it using heat tool, die cut using coordinating die and make few shaker elements for shaker window.
For the top front shaker box, take Deluxe Flower Shaping Paper and cut measure 10 by 9 inches piece. Start scoring from long side 4 1/2, 4 3/4, 9 1/4 and last score line on 9 1/2 set aside (don't adhere now). Trim two panels from Holiday Star Paper Collection sheet number 3A measures 4 1/2 by 9 inches and adhere one panel on the front scored piece and make a window by measuring half inches from the each sides, adhere clear card from the back side of the window using clear glue and adhere second 4 1/2 pattern paper panel on the other back side of scored piece and start folding from the scored lines, add foam strips top and bottom of the window from back side, put shaker elements inside the window and adhere the extra part and close the edges of this window by using clear glue. Trim 1/2 strips and adhere on the outside edges of the box using clear glue.
Stamp the star image from Holiday Star Cling Stamp Set on vellum and same image on Deluxe Silver Card using versamark embossing, cover with silver embossing powder and heat it using heat tool, die cut using coordinating die, cut shadow die on deluxe card as well, adhere vellum star image on the shadow shape using clear glue, and die cut the center star image from the large silver star image using center star die and take out inside snow flake star image also using coordinating die. adhere silver big star border on to the vellum star using clear glue.
Stamp the smallest poinsettia flowers from Large Festive Poinsettia Cling Stamp Set on Deluxe Paper using versamark embossing, cover with silver embossing powder and heat it using heat tool, die cut using coordinating die color the flower with Distress Shaded Lilac Ink using dauber, shape the flower using Golf Groove Tool and finish shaping using Deluxe Flower Making Kit, make a hole inside the flower using needle side of golf groove tool and add brads in the centers and make few flowers.
Stamp the tiny branches from Winter Wreath Accents Stamp Set on Deluxe Paper using versamark embossing, cover with white embossing powder and heat it using heat tool, die cut using coordinating die color it with Distress Shaded Lilac Ink using dauber.
Stamp magnolia buds from Sweet Magnolia Buds Stamp Set 2x on Vellum Paper using versamark embossing, cover with white embossing powder and heat it using heat tool, die cut using coordinating die
Cover the mould with white acrylic paint and apply Nida Tanweer magic glitter using sponge.
Arrange all ready Elements and lace as shown using hot glue and finish the card by adding pearls, rhinestones, crystal lacquer and nuvo drops.
Other Products:
Distress Ink Shaded Lilac, Dimensional Tape, Vellum Paper, Ranger Silver Embossing Powder, Versamark Embossing Ink, Brads, Pearls, Sequences, Round Mould, White Acrylic Paint, Art Pebbles, Nida Tanweer Magic Glitter, Rhinestones, Lace, Glass Beads. Hot Glue.


