Tuesday 29 September 2020

Golden Elaborate Birthday Card - Heartfelt Creations by Nida Tanweer

 Hello Everyone Welcome To My Blog....

Sharing my new card using Heartfelt Creations Elaborate birthday die & stamp set with golden mirror card.


Products Used:
Elaborate Birthday Die, HCD1-7322
Elaborate Birthday Cling Stamp Set, HCPC-3937
French Cottage 'scapes Die, HCD1-7293
French Cottage 'scapes Cling Stamp Set, HCPC-3909
Deluxe Flower Shaping Kit, HCST1-401
Stack and Store Daubers-Pack of 30, HCDA2-450
Deluxe Flower Shaping Paper Pack of 25 - White, HCPP1-468
Luxe Gold Cardstock, HCGP1-488
Groove Golf Tool Set, DMCT4185
Ranger Archival Ink Pad - Leaf Green, RACP436
Ranger Archival Ink Pad - Pink Peony, RACP649
Zig Clean Color Real Brush Markers - 36 Pack, 478455
Designer Dries Clear Adhesive, 159723
Metal Tip for Adhesive Bottles, 352854
Spellbinders Tool N' One, 359848
Hydra Sponges, RLHS100

Other Products: White cardstock, hot glue, archival ink venetian orange, hot glue gun, Heat Tool, versamark embossing ink, ranger gold tinsel embossing powder, acrylic block, Pearls, funnel tray, die cutting machine, Nida Tanweer Magic Glitter Powder.


Instructions: For the card base, die cut the shaped card using large elaborate birthday die on deluxe card, cut large elaborate birthday die on golden card and adhere on the card front using clear glue.

Stamp the sentiment “Happy Birthday” from versamark embossing ink and cover it using golden embossing powder and heat it using heat tool, diecut using coordinating die, add another layer for the 3D look and adhere this sentiment on the card front using clear glue.

For the flowers, stamp the flowers with venetian orange ink and color using pink peony die cut with coordinating die and make flowers. After shaping, add pearls using hot glue gun, for the leaves stamp with leafy green ink and color it using zig markers. Dab some Dries Clear glue onto a sponge, apply over card as desired, sprinkle with Nida Tanweer Glitter Powder and tap off.

Arrange all ready elements as shown using hot glue.

Instagram Profile : Nida Tanweer 

Friday 25 September 2020

Snowflake Splendor Etched Dies from Amazing Paper Grace

Welcome Back, 

So I hope you are enjoying this amazing collection from Amazing Paper Grace by Becca Feeken, and I'm sharing my second card today which is designed with Snowflake SplendorEtched Dies Christmas Cascade Collection.
 

Amazing Paper Grace Products Used: Snowflake Splendor Etched Dies Christmas Cascade Collection SKU S5-429.

Other Products Used: Black Cardstock, Prima Paper Collection, Golden Mirror Cardstock, Texture Paste, Stencil, Glitter Dust, Embellishment Beads, Clear Adhesive, Vellum, Just for You Stamp, Versamark Ink, Golden Embossing Powder, Dimensional Tape, Score Pal.


Tip: Layer double to give to 3D effect.


Thank You!
Follow for more inspiration.
@nidahandmadecards


Amazing Paper Grace Cascading Collection

Hello Buddies...

Welcome to my blog, We all love interactive and kinetic cards! Today I'm Sharing the waterfall card designed with Christmas Cascade Card Base Etched Dies Christmas Cascade Collection by Becca Feeken. 

This collection allows you to make a Cascading Card with so many possibilities.


Christmas Cascade Card Base Etched Dies Christmas Cascade Collection by Becca Feeken. SKU: S6-166


Amazing Paper Grace Product Used :
Christmas Cascade Card Base Etched Dies Christmas Cascade Collection SKU S-166Shapeabilities Candlewick Rosebud Etched Dies Candlewick Sampler Collection SKU-S4-1015Shapeabilities Cinch and Go V Etched Dies Vintage Treasures SKU S4-995.

Other Products : White Cardstock, Silver Mirror Cardstock, Purple Cardstock, Purple Ribbon, White & Purple Peral Beads, Clear Adhesive, Stamperia Paper Collection, Nida Tanweer Magic Glitter Powder, Archival Ink Fern Green, Nuvo Drops, Score Tape, Dimensional Tape, Score Pal.


Designed beautiful flowers using  Cinch & Go V S4-995


Thank You!
Follow for more inspiration.
@nidahandmadecards


Tuesday 22 September 2020

Debuting Special Sentiments - Heartfelt Creations by Nida Tanweer

Hello everyone happy Wednesday...

Today Heartfelt Creations releasing Special Sentiments Collections, and I'm sharing my first card using On Your Special Day'' Stamp & Coordinating Die Card designed with Zinnia flowers, I hope you will enjoy the step by step instructions.


 Products Used:

Large Garden Zinnia Die, HCD1-7314
Fancy Special Day Die, HCD1-7320
Small Garden Zinnia Die, HCD1-7315
Large Garden Zinnia Cling Stamp Set, HCPC-3923
Fancy Special Day Cling Stamp Set, HCPC-3935
Small Garden Zinnia Cling Stamp Set, HCPC-3924
Summer's Garden Paper Collection, HCDP1-2119
Small 3D Zinnia Shaping Mold, HCFB1-492
Courtyard Elegance Die, HCD1-7283
Leafy Accents Die, HCD1-7193
Leafy Accents Cling Stamp Set, HCPC-3835
3D Leafy Accents Shaping Mold, HCFB1-467
Deluxe Flower Shaping Kit, HCST1-401
Stack and Store Daubers-Pack of 30, HCDA2-450
Deluxe Flower Shaping Paper Pack of 25 - White, HCPP1-468
Luxe Gold Cardstock, HCGP1-488
Groove Golf Tool Set, DMCT4185
Ranger Archival Ink Pad - Vibrant Fuchsia, RACP524
Ranger Archival Ink Pad - Vivid Chartreuse, RACP531
Ranger Archival Ink Pad - Leaf Green, RACP436
Go Man Go Prills, ANC818
3-D Crystal Lacquer 4 oz, 3D1844
Designer Dries Clear Adhesive, 159723
Metal Tip for Adhesive Bottles, 352854
Spellbinders Tool N' One, 359848
Double Dots 100pc. -3D Foam Circles, DDOTS
Hydra Sponges, RLHS100
Scor-Pal Measuring & Scoring Board, 173842

Other Products: White cardstock, hot glue, archival ink dandalion, hot glue gun, dimensional adhesive, acrylic block, scissors, funnel tray, die cutting machine, Nida Tanweer Magic Glitter Powder, pearls, pearl string.


Instructions: Ready card base 6.8” by 6.8”, For the card base, cut a piece of Deluxe white cardstock to 13.6" x 6.8” size, score and fold at 13.8". Cut another piece of white cardstock size 6.5” x 6.5” and adhere this layer on card base using 3D foam tape. Trim green designer paper from Summer's Garden Paper Collection 6” x 6” using Courtyard Elegance border die and die cut inside frame die on golden card using courtyard elegance die, adhere green paper underneath golden frame and adhere this layer on the card white panel using dimensional adhesive and stick pearl string on the edges of white panel as shown.

Next, cut circle from paper collection using courtyard elegance die and adhere on to the golden frame center, stamp sentiment on white card using leaf green ink and diecut using coordinating die, cut shadow die on white also and layer together using clear glue. Adhere this sentiment on the card front using foam dots.

For the flowers, Stamp the 2nd smallest size (6x) of zinnia flower from Small Garden Zinnia Cling Stamp Set in Vibrant Fuchsia on Deluxe flower shaping card and diecut with coordinating dies. Color the center with yellow ink Dandalion and edges with Vibrant Fuchsia and from the back side also with vibrant fuchsia. Stamp 1st smallest zinnia petals (5x) in leaf green ink on Deluxe flower shaping paper, diecut with coordinating die and color the edges with leaf green ink. Stamp small leaves from zinnia and leafy accents from leafy accents stamp set with leaf green ink and color it Vivid ink and diecut using coordinating dies. Shade edges leaf green ink. Use the Stack and Store daubers to color the flowers and leaves.

Use the zinnia shaping molds and shaping kit to shape the petals. Use hot glue to assemble the flowers as shown. For the center, add some Dries Clear glue and sprinkle with prills.

Attach the zinnia and leafy accents and leaves onto card with hot glue. Dab some Dries Clear glue onto a sponge, apply over card as desired, sprinkle with Nida Tanweer Glitter Powder and tap off embellish with some pearls on golden frame.

Thank You!
Follow for more designs : @nidahandmadecards


Friday 18 September 2020

Spooky Shaker Card by Amazing Paper Grace

Hello Friends! 

I have another card today for Halloween, It's a shaker card with some spooky eyes, bat and some spider web. Shaker window designed with Nestabilities Nested Clipped Squares Etched Dies Halloween Collection from Amazing Paper Grace by Becca Feeken.

Used Spooky Boo Etched Dies Halloween Collection to design inside designing of shaker window.

Other Products Used:  Black Cardstock, Gray Pearl Cardstock, Light Gray Cardstock, Silver Mirror Cardstock, White Cardstock, Designer Dries Adhesive, Cutting Machine, Score Pal, Scissor, Dimensional Tape.


Happy Crafting!

Thank You!

For more amazing stuff visit Instagram Profile: @nidahandmadecards
 

Hey Boo! Spooky Card - Amazing Paper Grace

 Hello lovely people! How're you today... 
Welcome back to my blog! Today I'm here with another SPOOKY card which is I designed with Amazing Paper Grace Halloween Collection, Oh I love the detailing, Becca Feeken designed amazing collection to design Halloween Cards. I used HEY BOO sentiment to greet my buddies!


I used Spooky Boo Etched Dies Halloween Collection by Becca Feeken to design this card

Other Products Used:  Black Cardstock, Prima Paper Pack, Designer Dries Adhesive, Cutting Machine, Score Pal, Scissor, Dimensional Tape.


Cut this hexagon using Snowflake Splendor Etched Dies Christmas Cascading Collection by Becca Feeken.


Instructions: Its a ready card measures 8.2" by 5.3", It's a folding card. Cut a first panel on black cardstock measures 7.9" by 5", cut another panel on pattern paper measures 7.7" by 4.8" adhere this panel on back panel using clear glue. Place Hexagon die from Splendor Etched Dies Christmas Cascading Collection and make a window as shown, adhere this layer on to the card base using dimensional tape. Die cut all required shapes and arrange as shown.

Happy Crafting!

Thank You!

For more amazing stuff visit Instagram Profile: @nidahandmadecards

Tuesday 15 September 2020

I Appreciate You So Much - Heartfelt Creations

Hello beautiful people..
Happy Wednesday...

Welcome back to my blog.. It's my second take on to the Zinnia flowers I hope you like it.


Products Used:

Other Products: Off White pearl cardstock, hot glue, Archival ink pad - Dandelion, distress ink mowed lawn, hot glue gun, dimensional adhesive, acrylic block, scissors, funnel tray, die cutting machine, Nida Tanweer Magic Glitter Powder, Distresser Tool. 


Instructions: 
For the card base, Cut a piece of Deluxe white cardstock to 11.6" x 8.8” size, score and fold at 11.6". Trim green paper piece from Summer's Garden Paper Collection size 8.6” by 5.6” rough the edges using distresser tool. Trim pink paper from same paper collection size 8.4” by 5.4” rough the edges using distresser tool adhere pink paper on to the green paper using clear glue and adhere this panel on card base using dimensional tape. 

Next, cut Eyelet Lace Frames Die on Summer garden paper collection (1x) and (3x) on Deluxe shaping paper adhere paper collection cutout frame on to the white frame using clear glue, and layer extra 2 frames underneath with this layer using dimensional tape, adhere this frame on the card front as shown.

Stamp ‘I Appreciate You So Much’ sentiment in the center using black ink.

For the Zinnia flowers, Stamp the 3rd largest (3x), 2nd smallest (2x) from Small Garden Zinnia Cling Stamp Set in Archival Dandalion Ink on offwhite cardstock and diecut with coordinating dies.

and stamp 1st smallest zinnia petals (8x) in leaf green ink on offwhite pearl cardstock and diecut with coordinating dies. Stamp 2nd smallest (3x) using Vibrant Fuchsia ink. Stamp small leaves (3x) using leaf green ink. Stamp the leafy accents from leafy accents stamp set with leaf green ink and color leafy accents and zinnia small leaves with Vivid ink and diecut using coordinating dies. Shade edges with mowed lawn ink.
Use the Stack and Store daubers to color the flowers and leaves. Color the backside of the flower with same ink which is front on flowers and smallest petal with vivid Chartreuse ink. Shade small lady bud using zig markers.
use the zinnia shaping molds and shaping stylus and dmc shaping tool to shape the petals. Use hot glue to assemble the flowers as shown. For the center, add some Dries Clear glue and sprinkle with prills.
Attach the zinnia and leafy accents onto card with hot glue. Dab some Dries Clear glue onto a sponge, apply over card as desired, sprinkle with Nida Tanweer Glitter Powder and tap off.

Thank You!
For more amazing stuff visit Instagram Profile: @nidahandmadecards

Saturday 12 September 2020

Amazing Paper Grace September Die of the Month Blog Hop - Lattice Quadrante


Every once in awhile a die comes along that gives you so many combinations that it's almost like a puzzle.  Today we are sharing the Amazing Paper Grace Die of the Month for September 2020 -  Lattice Quadrante.  The four pieces of pristine cut, pie-shaped lattice with decorative edges will have you twirling, twisting, and setting the pieces on end figuring out all the beautiful configurations you can make.


Becca Feeken of Amazing Paper Grace sent me these lovely dies to create with.


Lattice Quadrante Details

Who isn't a fan of lattice?  Becca shared that so often she longs for pairs of motifs so that she can cut a symmetrical design in one pass.  This die is symmetry on steroids!  She has given us four identical motifs that function as inlays or can be used altogether with a rim to make a rounded central element.  The word quadrante comes from quads and is just the hint you need to know that there are four pie-shaped pieces in this set to create a configuration powerhouse.  


Today we want to inspire you to think of different combinations using the Die of the Month, Lattice Quadrante.


It's truly like a puzzle!  Here's what we came up with.

  1. Use all the motifs together in the rim for a large motif.
  2. Alternate motifs in the rim for an alternating lattice design.
  3. Cut each piece separately and use the pointed end as corners.
  4. Make a tall card by stacking two of the motifs the tall way.
  5. Make a pocket card by cutting two of the motifs side by side.
  6. Set the die on point and cut a v-shaped peek a boo piece.
Use one motif alone.

Are you getting the picture?  We can name so many more!

There are SEVEN dies included in the Lattice Quadrante Set


My Project Today using Lattice Quadrante

I designed layered, pearly, royal elegant card and Triangle Gift Box with this amazing Lattice Quadrante Die set.


Designer Tip: Stick tape to place your die for perfect cutting!


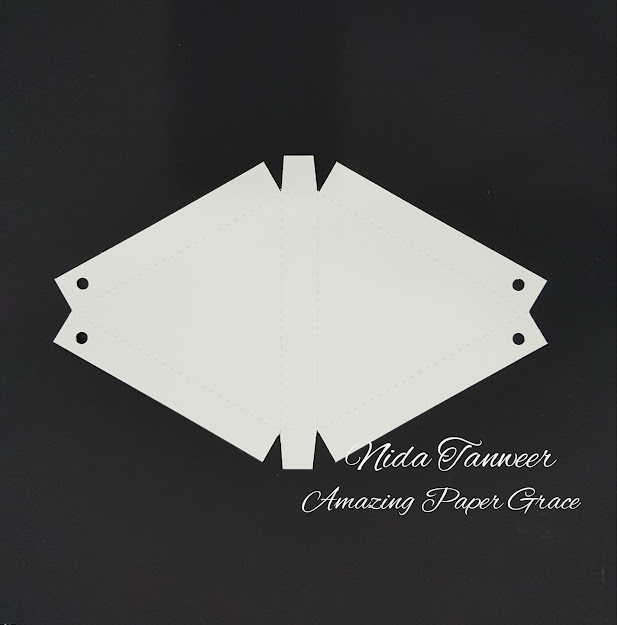
For the gift box i draw 3" x 3" x 3" triangle on white cardstock draw rectangle of half inch from one side of triangle and draw another triangle and leave space of half inch from each side to fold inside, mark lines for scoring, then assemble as shown.


Add ribbon to tie the box!


Supplies: Designer Dries Clear Adhesive, Pearl String, White Twine, Lace, Stamens, Ribbon, Nuvo Drops, Nida Tanweer Magic Glitter Powder. 
Paper: White Cardstock, Mint Cardstock, Prima Marketing Paper Havana, Golden Cardstock, 
Foil: Golden Foil Paper, Laminator 
Accessories:  Amazing Paper Grace September 2020 Die of the Month - Lattice Quadrante


Visit the Creative Team for more Lattice Quadrante Inspiration

Visit each Creative Team blog linked below for their take on creative paper crafting ideas with Lattice Quadrante, the new Amazing Paper Grace September 2020 Die of the Month!


Visit Joanna Wisniewska

Visit Kate Skonieczna

Visit Tara Brown

Visit Linda Parker

Visit Rajni Chawla  

Visit Nida Tanweer

Visit Becca Feeken at Amazing Paper Grace


Join us online here:


SHARING - Amazing Paper Grace Creative Encouragement Community Facebook Group.

POSTING Amazing Paper Grace Die of the Month page on Spellbinders -----> Upload so others can see your work!


TALKING - AmazingPaperGrace_Creates our new account on Instagram.  You ask there, we answer there.


If you are new to the Die of the Month Club, you may find this helpful -  

--------> How the Club Works.


If you missed the introduction, this will bring you up to date 

-------------->  Commonly Asked Questions.


Thank You,
For more projects visit my Instagram Profile : @nidahandmadecards

Happy Crafting.