Hey Friend!
Are you a crafter that loves making stamped framed cards but
sometimes feel limited, or uninspired? Do you feel stuck when trying to add
extra beauty and decoration to the confines of a card? Don’t waste another
minute feeling frustrated with limitations! Join us and learn the steps to
create an elegant card your friends and family will love!
The elegant frame dies are designed to be paired with coordinating stamps which allow you to create quick and easy one-of-a-kind framed cards paired with one of a kind sentiments; perfect for any paper crafting project! From beginners to advanced crafters, the Elegant Rose Frames Collection gives you professional looking results the quick and EZ way!
Step 1: Cut card base and mat layers.
♥ Card
size is 6 inches by 9 inches. Score and fold 12 by 6 inches Deluxe Flower
Shaping Paper at 6 inches on the long side to create card base.
♥ Cut
panel on black card measuring 5 3/4 by 8 3/4 inches.
♥ Trim
designer paper from Elegant Rose Frames Paper Collection measuring 5 1/2 by 8
1/2 inches from sheet 1B.
Step 2: Adhere layers.
♥ Adhere black cardstock on the card base using dimensional tape.
♥ Adhere designer paper onto the black panel using dries clear glue.
Step 3: Create the frame images.
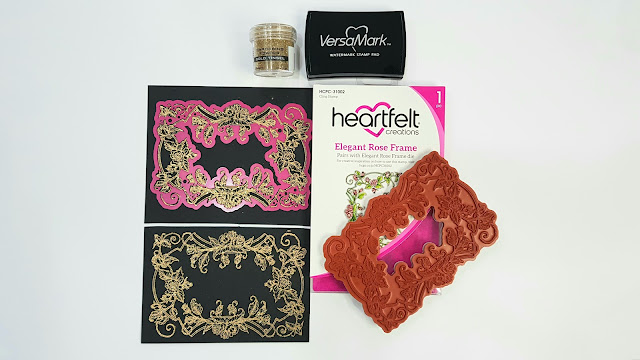
♥ Stamp the Elegant Rose Frame stamp on black cardstock using VersaMark
embossing ink 2x. Cover the image with Gold Tinsel Embossing Powder and heat it
using heating tool.
♥ Cover the image with Gold Tinsel Embossing
Powder and heat it using heating tool.
♥ Place the coordinating die of Elegant Rose frame on the image.
Step 4: Die cut the images.
♥ Die cut both stamped images.
♥ Die cut 2x extra shapes for the sturdiness of frames, and add under the
frame image using designer dries clear glue.
Step 5: Create the sentiment.
♥ Stamp the sentiment “Have a Wonderful Day” from Elegant Rose Sentiments
Stamp Set on the black cardstock using VersaMark embossing ink.
♥ Cover the image with Gold Tinsel Embossing
Powder and heat it using heating tool.
♥ Die cut the sentiment shadow die on deluxe card and adhere shadow image
under the sentiment image using clear glue.
Step 6: Adhere the frames to the card base.
♥ Adhere one frame in the top left side of the card front using clear
glue.
♥ Add dimensional tape on the back side of the other frame and place second
frame at the bottom right of the card.
♥ Adhere the sentiment in the center of the card front.

Step 7: Create branches.
♥ Stamp the branch from Stylish Rose Frame Stamp Set on the designer paper
sheet number 12B using VersaMark embossing ink 4x.
♥ Cover the images with Gold Tinsel Embossing
Powder and heat it using heating tool.
♥ Place the coordinating die of Elegant Rose frame on the image and die cut
all the images.
♥ Shape the branches using Deluxe Flower Shaping Kit.
Step 8: Create the flowers and leaves.
♥ Stamp the flowers and leaf images from Classic Rose Stamp Set on Vellum
Paper using VersaMark Embossing Ink.
♥ Cover the flowers image using Snowflake
Tinsel Embossing Powder and leaf images with Lime Tinsel Embossing Powder, heat
the images using heating tool and die cut using coordinating dies.
♥ Color the flower centers from the back side
using Cactus Flower Archival Ink with daubers and leaves image with Leaf Green
Ink.
♥ Shape the flowers and leaves in the Rose
Shaping Mold. Finish the shaping using the Deluxe Flower Shaping Kit and make a
few flowers using hot glue gun.


