Showing posts with label mixmedia. Show all posts

Tuesday, 23 May 2023

Mixmedia Card using Scrapaholics Chipboard Bicycle

In a realm where colors dance & dreams take flight,
A mix of media comes together, shining bright.
On a handmade card, a floral vision unfolds,
Whispering tales of beauty that words can't be told.

 Hello, Excited to share my new mixmedia card today, designed using Scrapaholics Scrapbook Supply chipboard Bicycle, I hope you will enjoy!


My card size is 9 by 6 inches!


Using different moulds of Prima Marketing & Finnabair Products!


You can order this gorgeous Bicycle HERE!


Tuesday, 19 July 2022

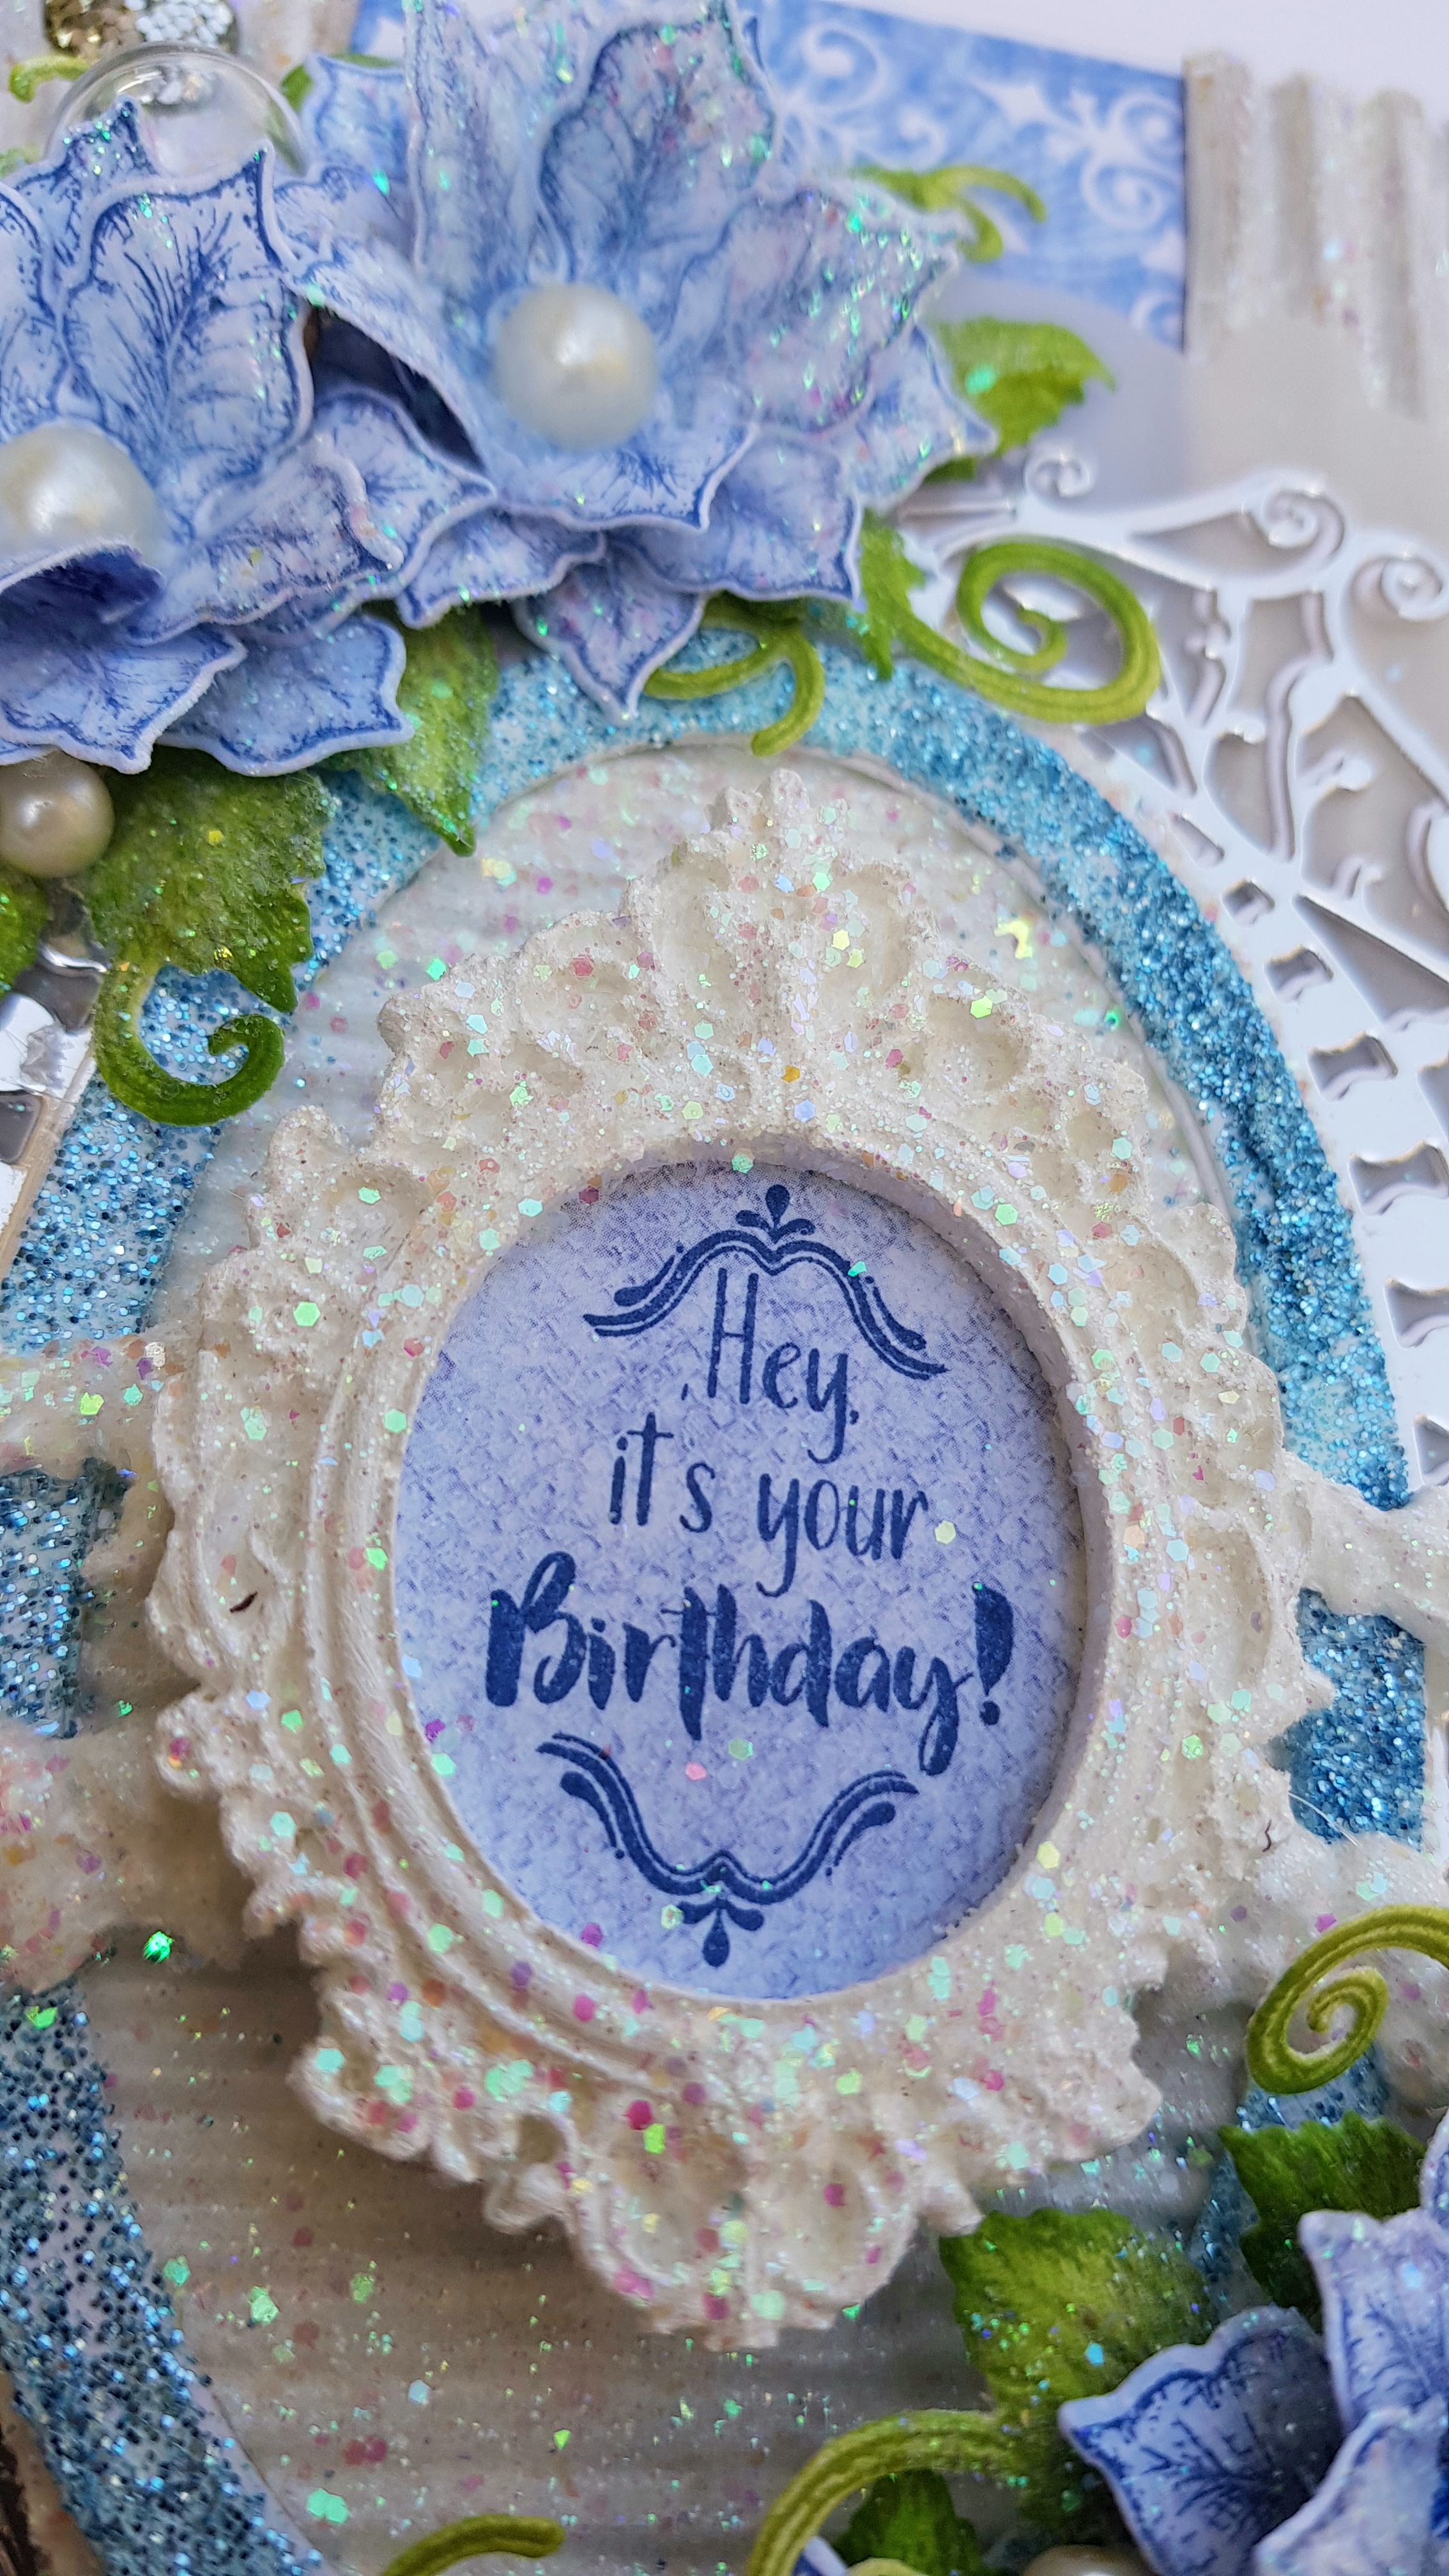
Birthday Card - Heartfelt Creations

Hello Buddies,
Hope you are doing well, 
Sharing my another cool card using Heartfelt Creations Holiday Star Paper Collection with gorgeous Poinsettia Flowers.


Its a ready folded card base measures 9 by 6 inches, trim a panel on Deluxe flower Shaping Paper measure 8 3/4 by 5 3/4 inches and adhere on to the card base using dimensional tape, trim a designer paper from Holiday Star Paper collection sheet number 5A which is slightly smaller then last panel and adhere onto the card base using clear glue.

Trim four small strips of corrugated sheet paper apply white acrylic paint roughly with brush apply clear glue after dry the paint and cover with Magic Glitter Powder, adhere these corrugated strips on the card base as shown using hot glue.

Die cut the shadow die from Fancy Classic Oval Frame Die on vellum and third largest die from the same set on Luxe Silver Card adhere this shape on the vellum shape using clear glue, cut the oval shape on corrugated sheet paper using oval die from Fancy Classic Oval Frame Die Set and apply white paint, next apply magic glitter and adhere this oval shape onto the silver frame using hot glue.

Die cut the oval shape using second and third largest die from Eyelet Oval Basic Large Die Set on Deluxe Card 2 adher together for the sturdiness apply versamark ink on it and cover with Blue Embossing Powder and heat it using heat tool, Add this oval frame on the oval corrugated shape using hot glue.

Cover the moulds with white paint and magic glitter, Stamp the sentiment from Birthday Sentiment Stamp Set using Night Sky Archival Ink on the designer paper and add insde the mould as shown, adhere moulds on the frame using hot glue.

Stamp the smallest poinsettia flowers from Large Festive Poinsettia Cling Stamp Set on designer paper sheet number 11 B using Night Sky Archival Ink die cut using coordinating die shape the flower using Golf Groove Tool and finish shaping using Deluxe Flower Making Kit, add pearl beads in the centers and make few flowers apply clear glue with sponge and cover the flowers with Nida Tanweer Magic glitter Powder.

Stamp The Leafy Accents on Deluxe Card using Leaf Green Archival Ink, color it using Vivid Chartreuse ink die cut using coordinating dies shape it in the shaping mould and cover with magic glitter powder.

Arrange all ready elements as shown using hot glue, add bridal stamens under the flowers in empty space and finish the card by adding resign silver beads.

Other Products:
Vellum Paper, corrugated sheet paper, Hot Glue, Nida Tanweer Magic Glitter Powder, Dimensional Tape, Moulds, White acrylic paint, Brush, Peal Beads, Adhesive Silver Beads, Versamark Embossing Ink, Blue Fern Embossing Powder, glass tussles.


           Nida Tanweer Link Tree

Saturday, 18 June 2022

Steampunk Mixmedia Card - Finnabair

 Hello Buddies,
It's a great day for me today & I would like to share an awesome news with all of you that I get featured in Worl'd Top 100 Best Card Makers, can't tell you the excitement after finding my name in Top 100 list, It's a great honor for me to share this wonderful news with all of you.
You can check my ranking HERE.

So... today I'm sharing very unique card with all of you, Vintage is my all time favorite, sharing steampunk card, working with the fabulous products from Finnabair, Anna & Prima Marketing Inc. 


It's a 9 by 6 inches card.


Tuesday, 7 December 2021

Debuting Heartfelt Creations Moments in Times Collection

Hello my friends! .... Happy Wednesday!
Experience the ease of creating elegant shaped cards with Heartfelt Creations the Moment in Time Collection, perfect to celebrate life's special moments! The beauty of this collection is awesome, the designs are timeless & can be used for the years. I designed something different using this collection and sharing my first inspirational Vintage Card using mix media and stamping technique with metal charms and moulds.
Check All Products List HERE!


Other Products: Die Cutting Machine, Brown Cardstock, grey cardstock, Light Brown Cardstock, Versamark Embossing Ink, Metal Charms Golden Embossing Powder, Black Embossing Powder, Ranger Liquid Platinum Embossing Powder, Vintage Photo Distress Ink, Ink Blender Brushes, Wooden embellishments, stencil, art pebbles, Molds, Brats, Brush, White Paint, Dimensional Tape, Hot Glue Gun, palette knife.

Instructions : It is a ready folding card measures 9 1/2 by 6 inches, cut a panel on grey cardstock measures 9 1/4 by 5 5/6 and adhere on to the card base using dimensional tape, cut a panel on Deluxe paper measures 8 7/8 by 5 3/8 and color the panel front with French Ultra Marine Ink using ink brush, then color the panel edges with Seafarer Ink, then apply Night sky ink on the edges and last apply jet black ink on the panel edges. Stamp the 'Precious Time' stamp on the panel using black ink from Timepiece Sentiments Cling Stamp Set. Apply texture paste on the panel using pallet knife and stencil, let it dry and adhere this panel on the card base using clear glue.

Stamp the different images from Timepiece Sentiments Cling Stamp Set on Brown, Light Brown and white cardstock using versamark embossing ink and cover images with golden, liquid platinum and black embossing powder and heat it using heat tool. Die cut using coordinating die. Heat embossed the clock arms with black embossing powder and diecut using coordinating die.

Stamp the clock image from Simple Moments Timepiece Stamp Set on brown cardstock with versamark embossing ink 2x and cover one image with Liquid Platinum Embossing powder and second image with golden embossing powder, heat it using heat tool, die cut using big circle die from Simple Moments Timepiece Die Set and die cut center clock part of golden clock from using 4th circle die from the same die set. Make a hole for brads in the center of small circle clock using golf groove tool and make a holes on the big clock as shown and add brads, add clock arms on the small clock and close by adding brads.

Color the edges of all diecuts with Vintage photo distress ink. 

Add foam dots from the back side of small clock and adhere on to the big clock.

Paint the moulds and wooden embellishments with Vintage photo distress ink.

Arranged all ready elements using dimensional tape and hot glue gun and embellish the card by applying clear glue randomly and sprinkle mini prills and white acrylic paint.

                                                               Follow me on Facebook!
                                                                  
Follow me on Instagram!
                                                               Follow me on YouTube!
                                                                            Pinterest!

Happy Crafting!