Showing posts with label Card. Show all posts

Saturday, 12 September 2020

Amazing Paper Grace September Die of the Month Blog Hop - Lattice Quadrante


Every once in awhile a die comes along that gives you so many combinations that it's almost like a puzzle.  Today we are sharing the Amazing Paper Grace Die of the Month for September 2020 -  Lattice Quadrante.  The four pieces of pristine cut, pie-shaped lattice with decorative edges will have you twirling, twisting, and setting the pieces on end figuring out all the beautiful configurations you can make.


Becca Feeken of Amazing Paper Grace sent me these lovely dies to create with.


Lattice Quadrante Details

Who isn't a fan of lattice?  Becca shared that so often she longs for pairs of motifs so that she can cut a symmetrical design in one pass.  This die is symmetry on steroids!  She has given us four identical motifs that function as inlays or can be used altogether with a rim to make a rounded central element.  The word quadrante comes from quads and is just the hint you need to know that there are four pie-shaped pieces in this set to create a configuration powerhouse.  


Today we want to inspire you to think of different combinations using the Die of the Month, Lattice Quadrante.


It's truly like a puzzle!  Here's what we came up with.

  1. Use all the motifs together in the rim for a large motif.
  2. Alternate motifs in the rim for an alternating lattice design.
  3. Cut each piece separately and use the pointed end as corners.
  4. Make a tall card by stacking two of the motifs the tall way.
  5. Make a pocket card by cutting two of the motifs side by side.
  6. Set the die on point and cut a v-shaped peek a boo piece.
Use one motif alone.

Are you getting the picture?  We can name so many more!

There are SEVEN dies included in the Lattice Quadrante Set


My Project Today using Lattice Quadrante

I designed layered, pearly, royal elegant card and Triangle Gift Box with this amazing Lattice Quadrante Die set.


Designer Tip: Stick tape to place your die for perfect cutting!


For the gift box i draw 3" x 3" x 3" triangle on white cardstock draw rectangle of half inch from one side of triangle and draw another triangle and leave space of half inch from each side to fold inside, mark lines for scoring, then assemble as shown.


Add ribbon to tie the box!


Supplies: Designer Dries Clear Adhesive, Pearl String, White Twine, Lace, Stamens, Ribbon, Nuvo Drops, Nida Tanweer Magic Glitter Powder. 
Paper: White Cardstock, Mint Cardstock, Prima Marketing Paper Havana, Golden Cardstock, 
Foil: Golden Foil Paper, Laminator 
Accessories:  Amazing Paper Grace September 2020 Die of the Month - Lattice Quadrante


Visit the Creative Team for more Lattice Quadrante Inspiration

Visit each Creative Team blog linked below for their take on creative paper crafting ideas with Lattice Quadrante, the new Amazing Paper Grace September 2020 Die of the Month!


Visit Joanna Wisniewska

Visit Kate Skonieczna

Visit Tara Brown

Visit Linda Parker

Visit Rajni Chawla  

Visit Nida Tanweer

Visit Becca Feeken at Amazing Paper Grace


Join us online here:


SHARING - Amazing Paper Grace Creative Encouragement Community Facebook Group.

POSTING - Amazing Paper Grace Die of the Month page on Spellbinders -----> Upload so others can see your work!


TALKING - AmazingPaperGrace_Creates our new account on Instagram.  You ask there, we answer there.


If you are new to the Die of the Month Club, you may find this helpful -  

--------> How the Club Works.


If you missed the introduction, this will bring you up to date 

-------------->  Commonly Asked Questions.


Thank You,
For more projects visit my Instagram Profile : @nidahandmadecards

Happy Crafting.


Sunday, 24 February 2019

Rose Bouquet For HCDT

Good Morning Buddies...

I'm here with another project for Heartfelt Creations DT Call.
It was really fun creating wedding projects with Classic Wedding Collection. I have created lots of beautiful projects with this collection, Church bells ring out and there's an excitement in the air, Loved ones gathered together to celebrate two heart joined in friendship being united in love! Beautiful theme with amazing sentiments for lovely occasions, today I have designed amazingly beautiful floral card "Always & Forever"


Products Used : 

HCDP1-279 Classic Wedding Paper Collection,HCPC-3789 Classic Wedding Bells Cling Stamp Set,
HCD1-7143 Classic Wedding  Bells Die,
HCD1-727 Vintage Floret Die,
HCD1-7144 Decorative Medallion Die,
HCPC-3808 Fanciful Carnation Cling Stamp,
HCD1-7166 Fanciful Carnation Die,

Smooth Cardstock, Score Board, 3D foam, Archival Ink Coffe, Multimedium Matte, Zig Clean Color Real Brush (Light Pink-026, Blue Gray-092, Pale Green-045, Flesh Color-071), Nuvo Crystal Drops, Acrylic Block, Glitter Dust, Glue, Pearl Strings, Thread Strings, Designer Dries Clear Adhesive, Lace, Lace Tussels, Distressing Tools & Scissors.


Instructions :

I'm using the white cardstock, the ready card measures 9 inches X 6.5 inches, It's a top folding card. To start, I cut my flowers from Vintage Floret die in different sizes and prepared it with Deluxe Flower Shaping Kit & dressed up my flowers with sparking glitter dust. Cut a sheet measuring 13 inches X 9 inches. Next, cut a panel for first layer measuring 6.1" X 8.6", I used Distresser to roughen up the edges, I love the look of the torn bits of edges, adhere this panel onto card base. Next, Cut another panel of pattern paper measuring 5.7" X 8.2" and gluing it down to a panel. I took beautiful sequence lace branch and adhere it on the bottom of the pattern paper. Next, I cut pattern paper panel from classic wedding paper measuring 3.3" X 4.6 " and adhere it onto another pattern paper measuring 3.5" by 4.8" next, i ready another panel of white card stock 3.7" X 5" and pasted my both glued panels onto this white panel, I adhered this multilayered small panel onto my card center right side then I stamped Fanciful Carnation cling stamp on white cardstock with Archival coffee ink and die cut out then I applied multimedium matte onto my cut outs and dressed up with my glitter dust. Next I adhered Decorative Medallion cutout on left side, I painted wedding bells & couple picture with Zig clean clear brush marker (all shades mentioned above). Once all the elements are ready I placed all elements & glued the flowers down, assemble the card as shown & added sentiment on it from the paper collection.


To finish the project, apply Nuvo crystal drops on card and flowers.

Monday, 18 February 2019

Designed Card For HCDT With Red Roses


Good Morning All!

Welcome, to my blog. Today I'm here with my first project for Heartfelt Creations Design Team. I used Vintage Floret Die Set to make this beautiful card. Perfect collection for designing red roses.


Products I Used:

HCD1-727 
Heartfelt Collections Vintage Floret Die,
HCPC-3790 Cling Stamps,
HCD1-7159 Simply Classic Leave Die,
HCST1-401 Deluxe Flower Shaping Kit,
Smooth Cardstock (white, red, brown),  Spellbinders Astoria Decorative Element, DCWV Paper, Versa Mark Embossing Ink, Ranger Embossing Powder (gold tinsel), Distress Ink (Gathered Twigs, Vintage Photo), Timholtz Stencil Harlequin, Finnabair Texture Paste Platinum Crackle, Prima Art Alchemy Impasto Paint Pitch Black, Nuvo Crystal Drops (autumn red), Nuvo Jewel Drops (Sea Breeze), Lace, Marianne Creatables Die, Double Sided Tape, 3D foam, Score Board, Designer Dries Clear Adhesive.


Instructions :

I started with the ready card measures 10 inches by 6 inches. It's a folding card. Cut a sheet measuring 12" x 10". Score into half from 12 inches & fold. Next, I Adhered a panel onto an offwhite card base which is slightly smaller then my card base, then I adhered another panel of pattered paper and pasted onto offwhite panel. 


Next, I applied crackle paste on top right corner and adhered lace, Then I die cut this intricate spellbinders frame and I heat embossed with gold tinsel and adhered it with 3D foam. Then I prepared my flowers, I decided I would not use more colors so that it looks a bit different from my other projects. I placed my elements and glued the flowers down. Then and used my sentiment stamp from HC Classic Wedding Collection and glued after heat emboss. 


To finish off, I applied nuvo drops on my flowers and card.

I hope you liked my card, I love how grungy and bright it looks. It has been a while since I made a card like this. The photos came out aesthetically magnificent. 


Monday, 13 August 2018

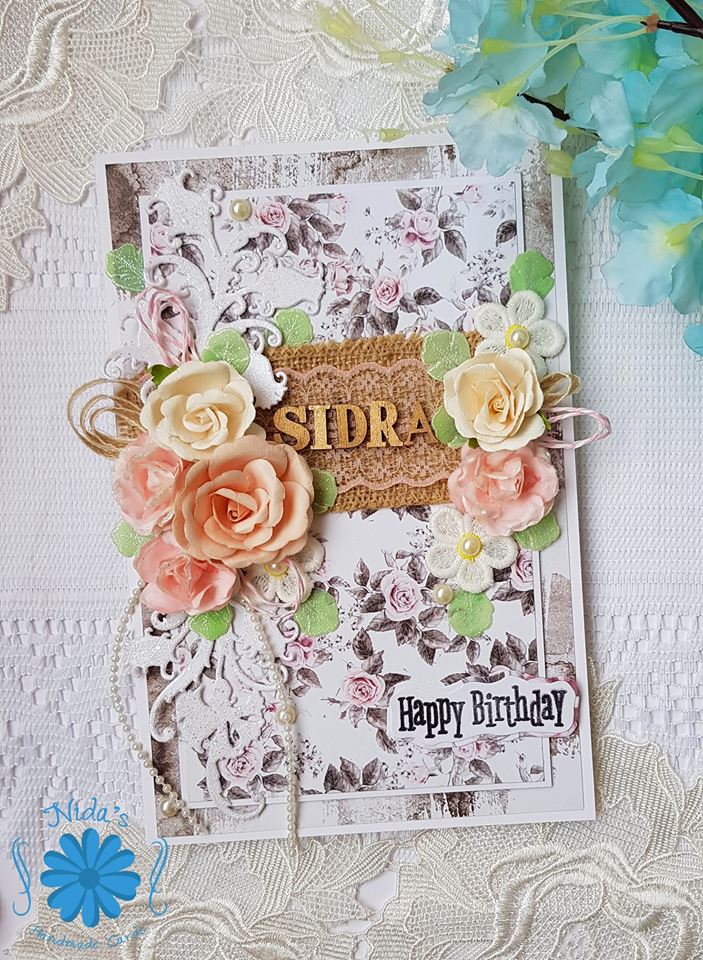
Birthday Card With Paper Curves Products


Hello Buddies !

I'm here with my new inspiration using Prima Marketing's paper collection ROSE QUARTZ 12 x 12 paper pad from Paper Curves UAE.

FULL VIEW :-


Products From Paper Curves:-

1, Prima Marketig ROSE QUARTZ Paper Collection 12x12
2, Prima Marketing Flowers - Love Story Charlize
3, Mulberry Flowers
4, Hemp Cord
5, Pearl String
6, Foam Tape
7, Classic Petunia Die
8, Ranger Embossing Powder
9, Vellum Sheet for leaves
10, Zig Clean Color Markers for leaves
11, Designer Dries White Adhesive


Other Products:-


1, Burlap Lace

2, White Card Stock
3, Heartfelt Creations Die
4, Pearls

5, Glitter
6, Lace Flowers


Wednesday, 25 April 2018

Happy Mother's Day

Hello everyone!
Welcome Back :) Another Mother's Day card for you.

I have one very colorful, Tropical, vibrant card to share with you today  featuring  Little Birdie Crafts Flowers.

This ones for you if you love Colours!
I Used DCWV Paper Collection with different layers to give 3D effect!


I took white cardstock on base ready sides fold card measures 9.4" by 6.5" creates & layer a piece of smooth white cardstock little smaller then a card base choose a pattern paper from DCWV's 'Bahama Mama' paper collection and create a top most layer of the card. Added burlap lace on my card, Then I choose another pattern paper from same collection and create another layer with golden cardstock base which is 1 inch smaller then my top patterned layer. Used washi tapes for create arrows and cut one tag with same tropical pattern paper then I choose third different paper and add another layer with same technique used some lace, net cloth & and Little Birdie flowers with leaves, Butterfly & bud.


I had so much fun with this card I used some Nuvo Crystal Drops and some glittery embellishments on this card.


I love how it turned out and its SO shimmery & colorful too!


Thursday, 16 February 2017

Fairy Land Shadow Box


Good Morning friends,
Welcome back, but this time in my Fairy Land, It's a special day for me I design this Fairy Land Shadow Box for Heartfelt Creations DT Using HC's New Wildwood Cottage Collection. This newest collection Unleash your imagination and explore magical gardens filled with light and airy floral, chirping birds, fluttering butterflies and of course the playful and enchanting sprites that call these gardens home.


I have used a chipboard 9" by 9" shadow box to create this garden. First I glued down the inside portion of the box with multiple layering of fence grass tiny flowers & flourish, the windows, Fence gate fairies and all pots & bird bath, fairy house are stamped with black archival and then painted with Zig markers. Flowers I stamped with Picked Resberry Distress and colored center part with Zig wink of stella glitter pen and shaped it with Deluxe Flower Shaping Kit & all leaves I stamped with Pealed Paint then painted with Zig Markers. The flowers are simply dust glittered using an rock candy. Fairy house's fence And gate i painted with peacock feather with water color brush pen.

Friday, 25 November 2016

Vintage (Botanical Roses)


It is birthday card for him :) using botanical roses from heartfelt Creations :)